Google Sheets is a super popular online spreadsheet platform that lets you collaborate on data in real-time. Ready to dive into the world of manipulating Google Sheets with the PHP API Client? Let’s get started!
To interact with Google Sheets using PHP, you can use Google’s official API client library for PHP. Here’s a basic guide to get you started:
Set up Google Sheets API project:
Go to the Google Developers Console (https://console.developers.google.com/).
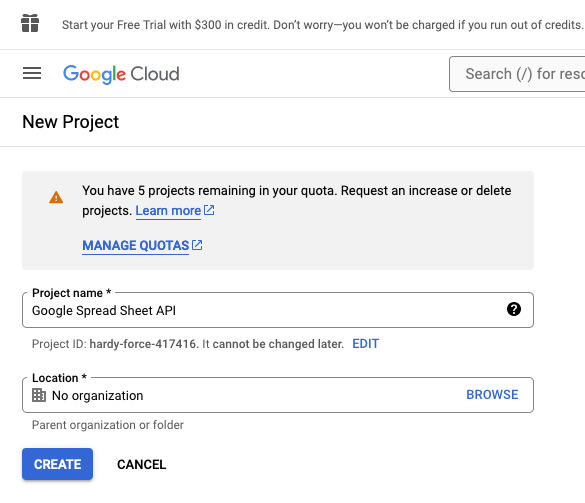
Create or select an existing project to configure Google Sheets API
Alrighty, let’s kick things off by setting up a fresh Google Console project so we can get the Sheets API up and running!
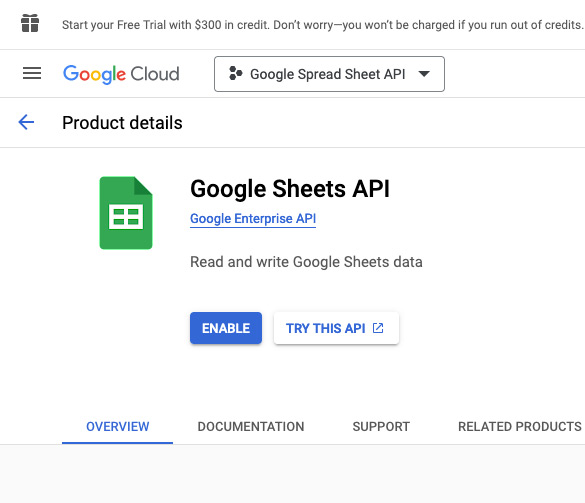
Simply click the ‘Enable‘ button, then use the search bar to find the ‘Google Sheets API.’ Once you’ve located it, just toggle the switch to enable the service!
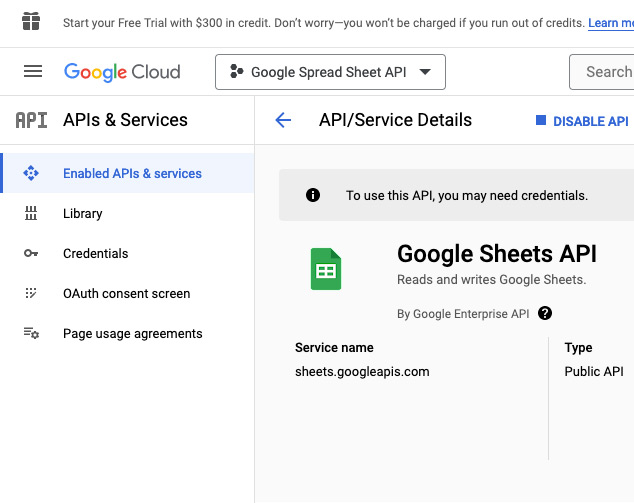
Once activated, it will appear as shown below, and from there, we can start creating credentials or customizing the google sheets service.
Let’s dive into creating credentials! In this handy tutorial, we’ll walk through the process of setting up Application data access.
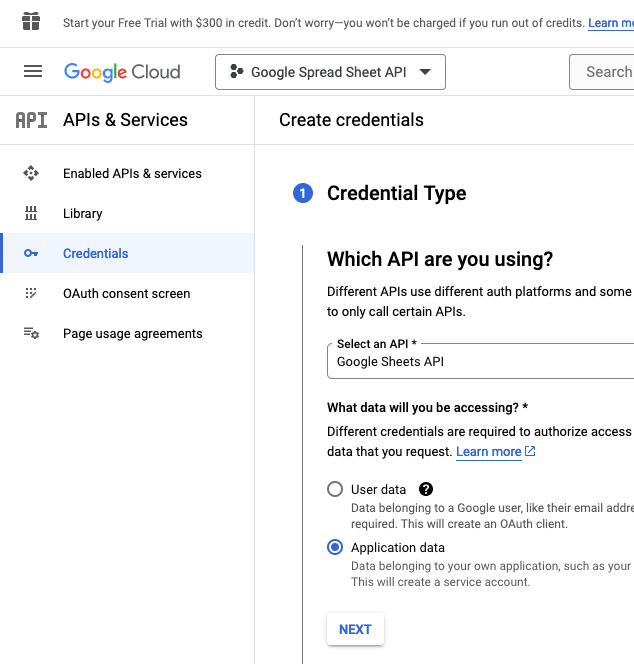
After that, let’s set up a service account (the generated email will be useful later).
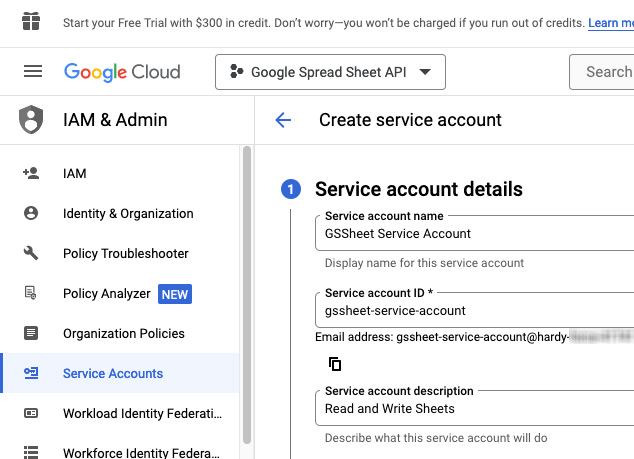
After successfully creating the service accounts, we proceed to edit the service account to generate a new key, utilizing the JSON type:
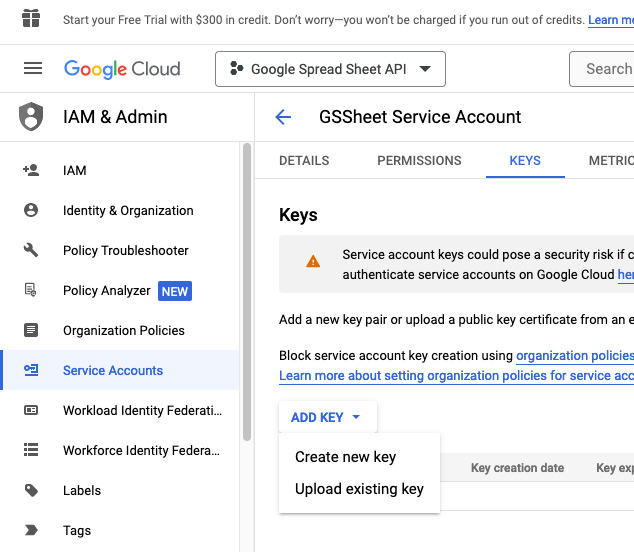
Great news! Your key file is all set for download onto your local computer. Once downloaded, don’t forget to give it a quick rename to “credentials.json“
And guess what? The somewhat tedious configuration part is officially done! ????
Create and Share a Google Sheets
Let’s dive into crafting a Google Sheets document together! For this walkthrough, I’ve decided to center our exploration around a fun collection of products. So grab your popcorn, and let’s get started!
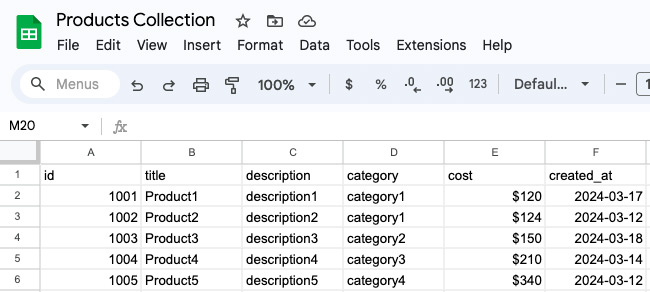
A google sheets can contain multiple sheets, but right now, it has only one sheet, and it’s called Sheet1!
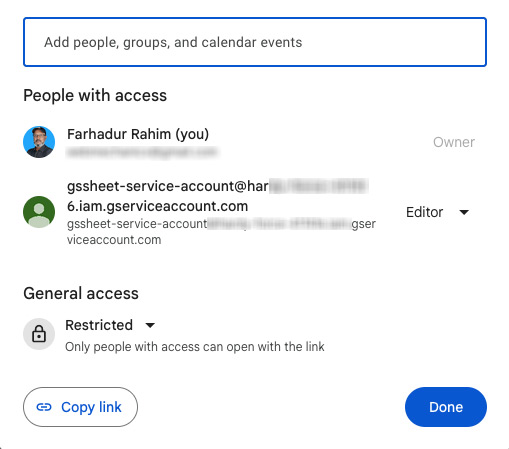
To be able to access and handle this document, we need to share it with the email address of the service account that was created earlier.
Install and Configure The Google API client library
You can install it via Composer, which is the recommended way:
composer require google/apiclient:^2.0To set up the client library with your credentials.json, simply create a configuration file with the name config.php following the example provided below. It’s as easy as that!
<?php

require __DIR__ . '/vendor/autoload.php'; // Path to autoload.php

use Google\Client;
use Google\Service\Sheets;

// configure the Google Client
$client = new Client();
$client->setApplicationName( 'Google Sheets API' );
$client->setScopes( [\Google_Service_Sheets::SPREADSHEETS] );
// for readOnly
//$client->addScope( Sheets::SPREADSHEETS_READONLY );
$client->setAuthConfig( 'data/credentials.json' ); // Path to your OAuth client credentials
$client->setAccessType( 'offline' );

$service = new Sheets( $client );
// the spreadsheet id can be found in the url https://docs.google.com/spreadsheets/d/143xVs9lPopFSF4eJQWloDYAndMor/edit /*

$spreadsheetId = 'your_google_spreadsheets_id';
Get the Google Sheets
We utilize the Google Sheets service for accessing the Spreadsheet entity. Please create a new file named “index.php” and insert the provided code below into it.
<?php
require __DIR__ . '/config.php'; // Path to config.php

// request to get spreadsheet
$spreadsheet = $service->spreadsheets->get( $spreadsheetId );

var_dump( $spreadsheet );
Retrieve all rows from a Google Sheets document
To achieve this, we will start by creating a new document named “fetch_rows.php” and then proceed to scan through all the rows present in a designated Google Sheets document. Below is the code snippet that needs to be included:We iterate through every row in a specified Google Sheets document.
<?php
/**
 * Fetch All the Rows of a Sheet
 * We read all the rows of a given google sheet:
 */
require __DIR__ . '/config.php'; // Path to config.php

// get all the rows of a sheet
$range    = 'Sheet1'; // here we use the name of the Sheet to get all the rows
$response = $service->spreadsheets_values->get( $spreadsheetId, $range );
$values   = $response->getValues();

// output
var_dump( $values );
Using a Range: Retrieve Several Rows
We read the first 10 lines of our Google Sheets. Begin by creating a fresh file named “fetch_rows_by_range.php” and inserting the provided code below.
<?php
/**
 * Fetch a Few Rows by Using a Range
 * We read the ten first lines of our Google Sheets
 */
require __DIR__ . '/config.php'; // Path to config.php

// we define here the expected range, columns from A to F and lines from 1 to 10
$range    = 'Sheet1!A1:F10';
$response = $service->spreadsheets_values->get( $spreadsheetId, $range );
$values   = $response->getValues();
var_dump( $values );
Using Range: Fetch Only Cells of a Given Column
Retrieve only the cells from a specified column. To accomplish this, we’ll generate a fresh file called “fetch_rows_by_range.php” and insert the subsequent code.
<?php
/**
 * Fetch a Few Rows by Using a Range
 * We read the cells of a given column to avoid fetching everything
 */
require __DIR__ . '/config.php'; // Path to config.php

// the column containing the movie title
$range    = 'Sheet1!B1:B4';
$response = $service->spreadsheets_values->get( $spreadsheetId, $range );
$values   = $response->getValues();
var_dump( $values );
Transforming Rows into JSON Objects
In lots of situations, it’s simpler to handle each row as its own entity. So, let’s convert each row into an associative array! To accomplish this, we’ll create a new file called “rows_to_json.php” and insert the subsequent code.
<?php
/**
 * Convert Rows into JSON Objects
 * In many cases, it's easier to manipulate each row as an independent object.
 * Let's transform each row into an associative array.
 */
require __DIR__ . '/config.php'; // Path to config.php

// Fetch the rows
$range    = 'Sheet1';
$response = $service->spreadsheets_values->get( $spreadsheetId, $range );
$rows     = $response->getValues();

// Remove the first one that contains headers
$headers = array_shift( $rows );

// Combine the headers with each following row
$array = [];

foreach ( $rows as $row ) {
    $array[] = array_combine( $headers, $row );
}

// output
//var_dump( $array );

// Convert it into a JSON string with a single line of code.
$jsonString = json_encode( $array, JSON_PRETTY_PRINT );

echo '<pre>';
print( $jsonString );
echo '</pre>';
Append New Data to Google Sheets
We add a fresh entry to the bottom of the google spreadsheets. To accomplish this, we’ll create a new file called “append_row.php” and insert the subsequent code.
<?php
/**
 * Append a New Row
 * write a new row at the end of the google sheet:
 */
require __DIR__ . '/config.php'; // Path to config.php

$newRows = [
    "1006",
    "Product6",
    "description6",
    "category1",
    "$150",
    "2024-03-19",
];

$rows = [$newRows];
// you can append several rows at once
$valueRange = new \Google_Service_Sheets_ValueRange();
$valueRange->setValues( $rows );
$range   = 'Sheet1'; // the service will detect the last row of this sheet
$options = ['valueInputOption' => 'USER_ENTERED'];
$service->spreadsheets_values->append( $spreadsheetId, $range, $valueRange, $options );
When you opt for USER_ENTERED as the valueInputOption, the system treats your data just like it would if you were typing it directly into Google Sheets. This means that strings will be automatically converted into dates, links, or other formats, depending on their content. It’s a seamless way to ensure consistency and accuracy in your spreadsheet entries.
Another handy feature at our disposal is the RAW input option, which ensures that our data remains unaltered throughout the process.
Update an Existing Data
We update an existing row with fresh values for its cells. To make this happen, we’ll start by creating a fresh file named “update_row.php” and then we’ll add in the following lines of code.
<?php
/**
 * Update an Existing Row.
 * Replace an existing row by new values for its cells of the google sheet:
 */
require __DIR__ . '/config.php'; // Path to config.php

$updateRow = [
    "1006",
    "Product6",
    "description6 updated row",
    "category1",
    "$122",
    "2024-03-19",
];

$rows       = [$updateRow];
$valueRange = new \Google_Service_Sheets_ValueRange();
$valueRange->setValues( $rows );
$range   = 'Sheet1!A7'; // where the replacement will start, here, first column and second line
$options = ['valueInputOption' => 'USER_ENTERED'];
$service->spreadsheets_values->update( $spreadsheetId, $range, $valueRange, $options );
Delete Some Data
We remove certain rows by indicating a range of cells to clear. To accomplish this, we’ll create a new file called “delete_row.php” and insert the subsequent code.
<?php
/**
 * Delete a Single or Multiple Rows.
 * Delete a single or multiple rows by specifying a range of cells to clear of the google sheet:
 */
require __DIR__ . '/config.php'; // Path to config.php

$range = 'Sheet1!A4:F4'; // the range to clear, the 4th and 4th lines
$clear = new \Google_Service_Sheets_ClearValuesRequest();
$service->spreadsheets_values->clear( $spreadsheetId, $range, $clear );
Download the Code and Examples
You’ll discover all the code snippets and examples conveniently in this GitHub repository.