Shield Your RESTful API: A Step-by-Step CodeIgniter 4 Tutorial
Creating secure and high-performing RESTful APIs plays a vital role in today’s web development landscape. In this article, we’re going to explore the power of CodeIgniter 4 and the Shield authentication system to craft strong and reliable APIs.
Welcome to my guide where I’ll walk you through the entire process of crafting a CodeIgniter 4 RESTful API with the added security of Shield Authentication. Get ready for a step-by-step adventure in creating CodeIgniter 4 RESTful APIs with Shield Authentication, and I promise to make it easy for you!
Shield is like your trusty sidekick for web development! It’s a fantastic authentication and authorization framework designed specifically for CodeIgniter 4. It not only provides a solid foundation of essential tools commonly used in websites but also boasts incredible flexibility and is configurable.
Think of it as your creative canvas where you can paint your own authentication and authorization masterpiece. With Shield, you have the power to customize and extend just about any part of it to suit your unique needs. It’s like having a toolkit that adapts to your every whim!
We’re excited to develop user authentication APIs using Shield!
- Login API
- Register API
- Profile API
- Logout API
We’re going to embark on an exciting journey, step by step, to build CodeIgniter 4 APIs with the power of Shield. Trust me, it’s going to be a fascinating topic to dive into and implement. In this adventure, we’ll be harnessing the capabilities of Shield for authentication in the realm of RESTful web services. If you’re a CodeIgniter enthusiast, you’re absolutely going to adore what this article has in store for you!
CodeIgniter 4 Installation
To set up CodeIgniter 4, simply enter the following command in your shell or terminal. Just ensure that you have Composer installed.
$ composer create-project codeigniter4/appstarter codeigniter-4Congrats! You’ve got the application up and running on your local system like a pro!
Setup Environment (.env) in Codeigniter 4
When you set up CodeIgniter 4, you’ll find an ‘env‘ file right at the root of your project. To make use of environment variables, which are essentially global variables, you’ll want to rename this ‘env‘ file to ‘.env‘.
We have two easy ways to accomplish this task. You can simply rename the file, it’s that straightforward! Alternatively, you can use a terminal command. Just open your project in the terminal, and you’re good to go!
$ cp env .envThe command above works like magic! It takes your “env” file and makes a duplicate, neatly named “.env” Voila! Your environment variables are all set to go.
Enable Development Mode in Codeigniter 4
By default, CodeIgniter operates in production mode, which means you won’t see any errors while working on your application. To make it show errors, switch it to development mode. Open .env file from the root.
# CI_ENVIRONMENT = production

 // Do it to

CI_ENVIRONMENT = development
Now the application is in development mode.
Create MySQL Database
To set up a database, you have two great options: you can create it using the user-friendly interface of PhpMyAdmin, or you can go the command-line route with MySQL commands. The choice is yours!
Let’s go ahead and create a database using MySQL commands. Simply run this command in the SQL tab of PhpMyAdmin, and we’ll have our database up and running in no time!
CREATE DATABASE codeigniter4_app;We’ve successfully set up a brand-new database! to use with our Codeigniter 4 application.
Database Configuration
To make changes to your database connection, let’s start by opening the .env file located in your project’s root directory. Once you’ve got that file open, search for the DATABASE section. This is where all the magic happens! Just update the connection details with your shiny new database string values, and you’ll be good to go.
#--------------------------------------------------------------------
# DATABASE
#--------------------------------------------------------------------

database.default.hostname = localhost
database.default.database = codeigniter4_app
database.default.username = admin
database.default.password = admin
database.default.DBDriver = MySQLi
database.default.DBPrefix =
database.default.port = 3306
Great news! The application and the database are now connected seamlessly, working together like a charm.
Installation of Shield Authentication Package
Let’s get started with your project! Open up your terminal and run this composer command to bring the fantastic ‘shield’ package on board.
$ composer require codeigniter4/shieldIMPORTANT: composer error
If you encounter the error below during the installation process:
Could not find a version of package codeigniter4/shield matching your minimum-stability (stable).
Require it with an explicit version constraint allowing its desired stability.
Let’s go through these simple steps together:
Steps:
1. To update your project’s composer.json file with a new minimum-stability setting, simply follow these friendly instructions
$ composer config minimum-stability dev

$ composer config prefer-stable true
Or
2. Specify an explicit version:
$ composer require codeigniter4/shield:dev-developLet’s get started by running Shield’s first command to kick off the installation process!
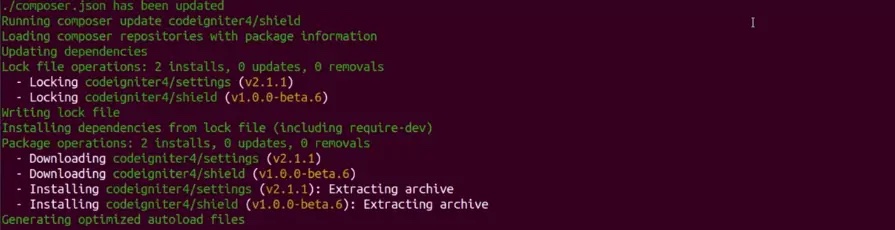
Great news! The shield package has been successfully installed. Now, let’s go ahead and set up the files with a smile on our faces!
Shield Authentication Installation
Let’s head back to the terminal and give this command a go, shall we?
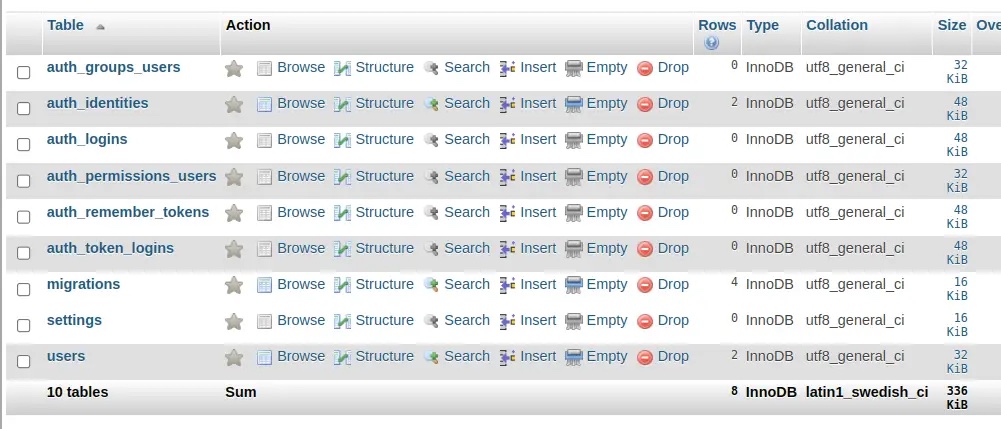
$ php spark shield:setupRunning this command will not only update existing application files but also introduce brand-new files and set up migration tables.
Once you’ve completed the migration process, take a peek inside your database, and you’ll find those tables waiting for you like old friends 🙂
Great news! We’ve got everything set up with a protective shield in our application, and we’re all set to start creating APIs. Ready to dive into the exciting world of API development!
Process of User API Development
We’re going to put together an API controller, routes, and more to make user APIs a breeze to create.
Let’s set up an API Controller! Simply open your project’s terminal and give this command a roll.
$ php spark make:controller Auth --suffix --restfulCertainly! You’ll find a new file named “AuthController.php” generated within the /app/Controllers directory. Let’s open up “AuthController.php” and insert the following code snippet into it.
<?php

namespace App\Controllers;

use CodeIgniter\RESTful\ResourceController;
use CodeIgniter\Shield\Models\UserModel;
use CodeIgniter\Shield\Entities\User;

class AuthController extends ResourceController
{
    //...
}
Make sure to bring the User model and User entity into the controller file.
use CodeIgniter\Shield\Models\UserModel;
use CodeIgniter\Shield\Entities\User;
Add Register Method
An API is like a helpful friend that makes it easy to add and store users in a database. All you have to do is provide the API with the username, email, and password, and it will take care of the rest for you!
//...

    // Post
    public function register()
    {
        $rules = [
            "username" => "required|is_unique[users.username]",
            "email" => "required|valid_email|is_unique[auth_identities.secret]",
            "password" => "required"
        ];

        if (!$this->validate($rules)) {

            $response = [
                "status" => false,
                "message" => $this->validator->getErrors(),
                "data" => []
            ];
        } else {

            // User Model
            $userObject = new UserModel();

            // User Entity
            $userEntityObject = new User([
                "username" => $this->request->getVar("username"),
                "email" => $this->request->getVar("email"),
                "password" => $this->request->getVar("password")
            ]);

            $userObject->save($userEntityObject);

            $response = [
                "status" => true,
                "message" => "User saved successfully",
                "data" => []
            ];
        }

        return $this->respondCreated($response);
    }
//...
Add Login Method
Login API makes it super easy for users to log into the application. All you have to do is provide your email and password, and you’re good to go!
//...

    // Post
    public function login()
    {

        if(auth()->loggedIn()){
            auth()->logout();
        }

        $rules = [
            "email" => "required|valid_email",
            "password" => "required"
        ];

        if (!$this->validate($rules)) {

            $response = [
                "status" => false,
                "message" => $this->validator->getErrors(),
                "data" => []
            ];
        } else {

            // success
            $credentials = [
                "email" => $this->request->getVar("email"),
                "password" => $this->request->getVar("password")
            ];

            $loginAttempt = auth()->attempt($credentials);

            if (!$loginAttempt->isOK()) {

                $response = [
                    "status" => false,
                    "message" => "Invalid login details",
                    "data" => []
                ];
            } else {

                // We have a valid data set
                $userObject = new UserModel();

                $userData = $userObject->findById(auth()->id());

                $token = $userData->generateAccessToken("thisismysecretkey");

                $auth_token = $token->raw_token;

                $response = [
                    "status" => true,
                    "message" => "User logged in successfully",
                    "data" => [
                        "token" => $auth_token
                    ]
                ];
            }
        }

        return $this->respondCreated($response);
    }

//...
Add Profile Method
Profile API makes it easy to access and retrieve the profile information of the user who is currently logged in.
//...

    // Get
    public function profile()
    {
        $userId = auth()->id();

        $userObject = new UserModel();

        $userData = $userObject->findById($userId);

        return $this->respondCreated([
            "status" => true,
            "message" => "Profile information of logged in user",
            "data" => [
                "user" => $userData
            ]
        ]);
    }

//...
Add Logout Method
Logout API makes it easy for users to log out from the application, ensuring a smooth and hassle-free experience.
//...

    // Get
    public function logout()
    {
        auth()->logout();

        auth()->user()->revokeAllAccessTokens();

        return $this->respondCreated([
            "status" => true,
            "message" => "User logged out successfully",
            "data" => []
        ]);
    }

//...
Add Access-deny Method
Here’s a friendly method that provides a JSON response when someone encounters an access denied page.
//...

    public function accessDenied()
    {
        return $this->respondCreated([
            "status" => false,
            "message" => "Invalid access",
            "data" => []
        ]);
    }
//...
Great news! We’ve successfully incorporated all the methods into the AuthController.php file.
Let’s Create API Routes Together!
Let’s go ahead and access the Routes.php file located in the /app/Config folder.
//...

service('auth')->routes($routes);

// API Routes
$routes->group("api", ["namespace" => "App\Controllers"], function ($routes) {

    $routes->get("invalid-access", "AuthController::accessDenied");

    // Post
    $routes->post("register", "AuthController::register");

    // Post
    $routes->post("login", "AuthController::login");

    // Get
    $routes->get("profile", "AuthController::profile", ["filter" => "apiauth"]);

    // Get
    $routes->get("logout", "AuthController::logout", ["filter" => "apiauth"]);
});

//...
Create & Register API Filter
Let’s head back to the project terminal and give this command a whirl to set up our API filter.
$ php spark make:filter Auth --suffixLet’s go ahead and generate the AuthFilter.php file in your /app/Filters folder. Once that’s done, open up the AuthFilter.php file and drop in the following lines of code.
<?php

namespace App\Filters;

use CodeIgniter\Filters\FilterInterface;
use CodeIgniter\HTTP\RequestInterface;
use CodeIgniter\HTTP\ResponseInterface;

class AuthFilter implements FilterInterface
{
    public function before(RequestInterface $request, $arguments = null)
    {
        helper("auth");

        if (!auth("tokens")->loggedIn()) {
            return redirect()->to(base_url("api/invalid-access"));
        }
    }

    public function after(RequestInterface $request, ResponseInterface $response, $arguments = null)
    {
        //
    }
}
To make the most of the filter we’ve just created, let’s begin by registering in the application. Simply open the Filters.php file located in the /app/Config folder. In this file, look for the $aliases array and add the following line to it. That’s all you need to do!
//...

public array $aliases = [
    //...
    'apiauth' => AuthFilter::class,
];

//...
Application Testing
Alright, it’s time to dive into API testing! Let’s get started by opening your project’s terminal and kickstarting the development server with this simple command:
$ php spark serveRegister API
Method: POST

Form-data: username, email, password

URL: http://localhost:8080/api/register
Login API
Method: POST

Form-data: email, password

URL: http://localhost:8080/api/login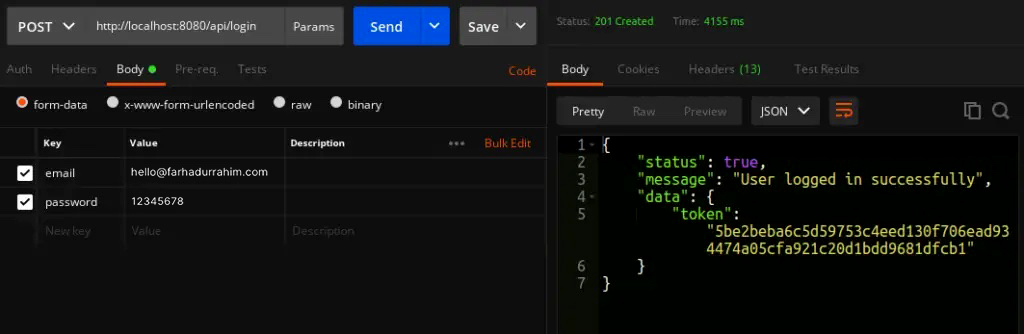
Profile API
Method: GET

Headers: Authorization: Bearer 5be2beba6c5d59753c4eed130f706ead934474a05cfa921c20d1bdd9681dfcb1

URL: http://localhost:8080/api/profile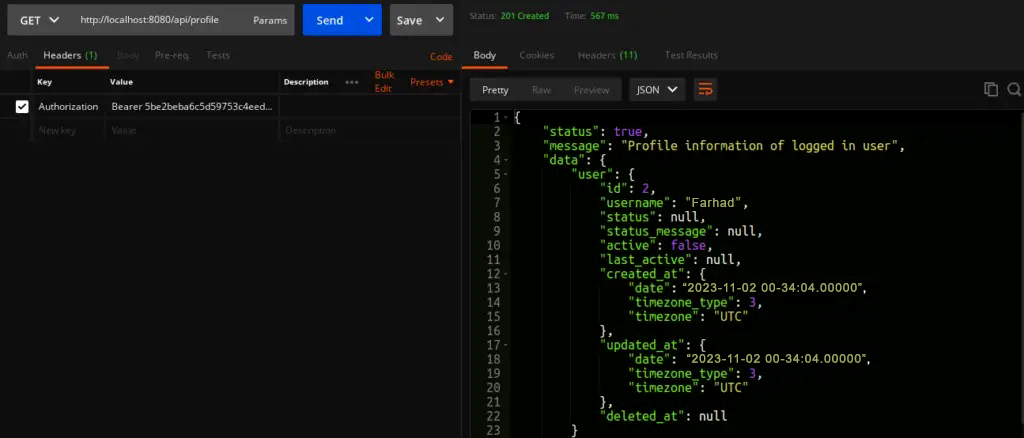
Logout API
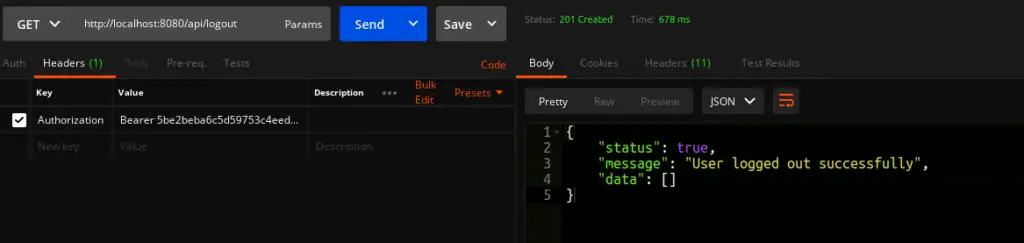
I trust that this article has provided you with a comprehensive guide on mastering CodeIgniter 4’s RESTful API with Shield Authentication. Feel free to explore this tutorial for an in-depth understanding!